Kenmore Model 665 Dishwasher Manual: A Comprehensive Guide
This manual provides detailed instructions for the Kenmore 665 dishwasher, covering parts, operation, maintenance, and troubleshooting for optimal performance and longevity.
Welcome to the world of effortless dishwashing with your new Kenmore 665 dishwasher! This appliance is designed to provide reliable and efficient cleaning, saving you time and effort in the kitchen. This manual serves as your comprehensive guide to understanding and utilizing all the features of your dishwasher.
Before you begin, please take a few moments to familiarize yourself with the contents of this manual. It includes detailed information on safety precautions, dishwasher components, operating instructions, maintenance procedures, and troubleshooting tips. Proper understanding of these guidelines will ensure optimal performance and extend the lifespan of your Kenmore 665.
The Kenmore 665 boasts a variety of wash cycles to accommodate different dishwashing needs, from delicate glassware to heavily soiled pots and pans. We’ll guide you through selecting the appropriate cycle and utilizing the detergent dispenser effectively. Remember to consult the parts diagram for a clear understanding of the dishwasher’s internal structure.
Safety Precautions
Your safety is paramount. Before operating the Kenmore 665 dishwasher, carefully review these crucial safety precautions. Always disconnect the power supply before performing any maintenance or cleaning. Never allow children to operate or play near the dishwasher.
Exercise caution when opening the door during or immediately after a wash cycle, as hot steam may escape. Avoid using harsh chemicals or abrasive cleaners, as they can damage the dishwasher’s interior. Ensure proper grounding to prevent electrical shock.
Do not attempt to repair the dishwasher yourself; contact qualified service personnel for assistance. Keep flammable materials away from the appliance. Regularly inspect the power cord for damage and replace if necessary. Improper installation or use can lead to hazards; adhere strictly to the installation guidelines. Always load dishes carefully to prevent breakage or injury.

Understanding Your Dishwasher
Familiarize yourself with the Kenmore 665’s components and features. This section details the parts, control panel, and proper loading techniques for efficient cleaning.

Dishwasher Parts Diagram
This diagram illustrates the key components of your Kenmore 665 dishwasher. Understanding these parts is crucial for maintenance and troubleshooting. Key areas include the spray arms – both upper and lower – responsible for water distribution during cycles. The filter assembly, located at the base of the dishwasher, traps food particles and requires regular cleaning to maintain optimal performance.
The detergent dispenser releases detergent at the appropriate time during the wash cycle. The silverware basket securely holds utensils during washing. The racks, both upper and lower, are designed for efficient loading of dishes. The water inlet valve controls water flow into the dishwasher, while the drain pump expels wastewater. The heating element heats the water to the desired temperature for effective cleaning. Finally, the control panel houses the electronic controls for cycle selection and operation. Refer to this diagram when identifying parts for repair or replacement.
Control Panel Overview
The Kenmore 665 dishwasher’s control panel provides intuitive operation. The Power button initiates and terminates the dishwasher’s operation. Cycle selection buttons allow you to choose from various wash cycles, including Normal, Heavy, Delicate, and Rinse Only. A cycle status indicator displays the current stage of the wash cycle – Wash, Rinse, or Dry.
The Delay Start option allows you to postpone the start of a cycle for convenient operation. A High Temp Wash option boosts water temperature for enhanced cleaning. The Heated Dry control activates or deactivates the heated drying function; An Error Code display illuminates to indicate any malfunctions, referencing the troubleshooting section of this manual. Familiarize yourself with these controls to optimize your dishwashing experience. The panel also features a child lock function for safety, preventing accidental operation. Proper understanding ensures efficient and effective use of your dishwasher.
Loading Instructions
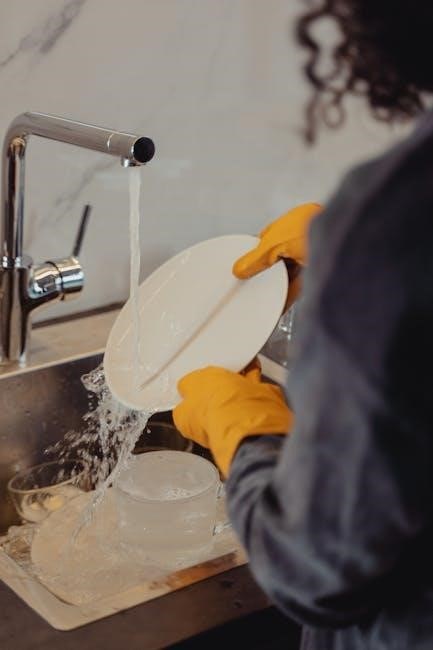
Proper loading maximizes cleaning performance. Remove large food particles before loading. Load dishes with the soiled surfaces facing the spray arms. Avoid overcrowding; dishes should not block water circulation. Place pots, pans, and larger items on the bottom rack, ensuring they don’t obstruct the detergent dispenser.
Glasses, cups, and smaller items go on the top rack. Secure lightweight items to prevent movement during the wash cycle. Ensure spray arms can rotate freely. Avoid placing items directly over the spray arms. Load silverware in the designated basket with handles down for optimal cleaning. Do not mix silverware types within the same compartment; Proper loading prevents re-washing and ensures sparkling clean results. Following these guidelines will extend the life of your dishwasher and improve cleaning efficiency.
Proper Rack Arrangement
Optimizing rack arrangement is crucial for effective cleaning. The bottom rack is designed for larger, heavier items like pots, pans, and baking dishes. Face soiled surfaces towards the center spray arm. Avoid blocking the detergent dispenser. Secure large items to prevent shifting during operation. The upper rack accommodates glasses, cups, bowls, and smaller plates.
Adjust the upper rack height if necessary to accommodate taller items. Ensure items don’t interfere with the upper spray arm’s rotation. Delicate glassware should be placed securely to prevent breakage. Avoid overcrowding either rack, allowing water to reach all surfaces. Proper spacing ensures thorough cleaning and prevents re-washing. Strategic arrangement maximizes space and cleaning power.
Silverware Basket Usage
The silverware basket is designed for efficient and hygienic utensil cleaning. Alternate utensil placement – forks and spoons facing up, knives facing down – to prevent nesting and ensure thorough water contact. Separate silverware types to avoid metallic tastes transferring between items. Utilize the basket’s dividers to keep items separated and prevent them from sticking together.
Overcrowding the basket reduces cleaning effectiveness. For heavily soiled silverware, pre-soaking can improve results. Long utensils can be laid flat if the basket isn’t fully utilized. Ensure the basket is securely positioned within the dishwasher to prevent it from tipping during the wash cycle. Regularly check for and remove any food particles trapped within the basket.

Operating the Dishwasher
Proper operation ensures optimal cleaning and efficiency. Select the appropriate cycle, load detergent correctly, and initiate the wash cycle following the outlined steps for best results.
Cycle Selection Guide
Understanding the various wash cycles on your Kenmore 665 dishwasher is crucial for achieving sparkling clean dishes and maximizing energy efficiency. This guide details each cycle’s purpose and recommended usage.
Normal Wash: Ideal for everyday dish loads with moderate soil levels. This cycle balances cleaning power with water and energy conservation.
Heavy Duty: Designed for heavily soiled pots, pans, and casserole dishes. It utilizes higher water temperatures and extended wash times for superior cleaning.

Delicate/China: Perfect for fragile items like glassware and china. This cycle uses a gentler wash action and lower water temperatures to prevent damage.
Quick Wash: A shorter cycle for lightly soiled dishes when time is limited. It provides a faster cleaning solution without compromising results significantly.
Rinse Only: Useful for rinsing dishes that will be washed later, preventing food from drying on. It uses minimal water and detergent.
Energy Saver/Eco: Optimizes water and energy usage for environmentally conscious cleaning. It may extend the cycle time slightly.
Sanitize: Employs high water temperatures to eliminate bacteria and germs, ideal for baby bottles or cutting boards.
Detergent Dispenser Instructions
Properly loading the detergent dispenser is essential for optimal cleaning performance with your Kenmore 665 dishwasher. This section details the correct procedure for both powder and liquid detergents.
Locating the Dispenser: The detergent dispenser is typically located inside the dishwasher door, near the control panel. It features compartments for detergent, rinse aid, and sometimes a pre-wash compartment.
Powder Detergent: Fill the main wash compartment with the recommended amount of powder detergent, based on the cycle selected and the level of soil on your dishes. Avoid overfilling.
Liquid Detergent: If using liquid detergent, ensure it’s specifically formulated for dishwashers. Fill the liquid detergent compartment to the indicated fill line. Do not use hand dish soap.
Rinse Aid: Fill the rinse aid dispenser to help dishes dry more effectively and prevent water spots. Adjust the rinse aid level based on your water hardness.
Closing the Dispenser: Securely close the detergent dispenser door before starting the wash cycle. Ensure it latches properly to release the detergent at the correct time.

Starting a Wash Cycle
Before initiating a wash cycle on your Kenmore 665 dishwasher, confirm several crucial steps for optimal results. Ensure dishes are loaded correctly, the detergent dispenser is filled appropriately, and the door is securely latched;
Cycle Selection: Select the desired wash cycle using the control panel. Consider the soil level and type of dishes when choosing a cycle – options typically include Normal, Heavy, Delicate, and Quick Wash.
Options & Modifications: Utilize available options like heated dry, sanitize, or delay start to customize the cycle to your needs. Adjust settings as required for specific loads.
Initiating the Cycle: Press the “Start” or “Play” button to begin the wash cycle. The dishwasher will automatically fill with water and commence the washing process.
Monitoring Progress: The control panel will display the cycle’s progress. Avoid interrupting the cycle unless absolutely necessary. Do not open the door mid-cycle.
Cycle Completion: Once the cycle is complete, allow the dishes to cool before unloading. Unload the dishwasher starting with the lower rack to prevent water from dripping onto clean dishes.

Maintenance and Troubleshooting
Regular cleaning and prompt troubleshooting are vital for maintaining your Kenmore 665 dishwasher’s efficiency. Address issues quickly to prevent further damage and ensure optimal performance.
Cleaning the Dishwasher
Maintaining a clean dishwasher is crucial for optimal performance and hygiene. Regularly wipe down the door and control panel with a damp cloth and mild detergent. For interior cleaning, run an empty cycle with dishwasher cleaner monthly to remove buildup and odors.
To deep clean, remove and wash the spray arms and filter (see Filter Cleaning Procedures). Inspect the door gaskets for any food particles or mildew and clean thoroughly. Avoid abrasive cleaners, as they can damage the stainless steel interior.
A simple solution of vinegar can also be used for a natural cleaning cycle. Pour one cup of white vinegar into the detergent dispenser and run a hot water cycle. This helps dissolve mineral deposits and freshen the dishwasher. Always ensure the dishwasher is empty during cleaning cycles. Consistent cleaning prevents malfunctions and extends the life of your Kenmore 665.
Filter Cleaning Procedures
Regular filter cleaning is essential for preventing clogs and ensuring efficient dishwasher operation. Locate the filter assembly, typically at the bottom of the dishwasher interior. Carefully remove the filter components – usually a cylindrical filter and a flat mesh screen – by twisting or lifting as indicated in the manual’s diagrams.
Rinse the filter parts under warm running water, using a soft brush to remove stubborn food particles. Avoid using soap, as it can leave residue. Inspect the filter for any damage, such as cracks or tears, and replace if necessary.
Reassemble the filter components correctly, ensuring they are securely in place. A properly installed filter prevents food debris from recirculating during wash cycles. Clean the filter at least once a month, or more frequently if you notice reduced cleaning performance or a clogged drain. This simple maintenance step significantly improves your Kenmore 665’s effectiveness.
Common Problems and Solutions
If your Kenmore 665 isn’t draining, first check the drain hose for kinks or obstructions. Ensure the air gap (if present) is clear. A clogged filter is another frequent cause; clean it thoroughly. If the issue persists, the drain pump may be faulty and require professional repair.
For poor cleaning performance, verify proper loading techniques and sufficient detergent usage. Check the spray arms for blockages and rotate them freely. Low water temperature can also hinder cleaning; ensure your hot water heater is set appropriately.
Error codes indicate specific issues. Consult the manual’s error code section for definitions and suggested remedies. Common codes relate to water supply, heating, or sensor malfunctions. If you’re uncomfortable troubleshooting, contact Kenmore support for assistance.
Dishwasher Not Draining
A Kenmore 665 dishwasher failing to drain is a common issue, often easily resolved. Begin by inspecting the drain hose for any kinks, bends, or obstructions that might be restricting water flow. Next, carefully check the air gap, if your model has one, ensuring it’s free from food particles and debris.
A clogged filter is a primary culprit. Remove and thoroughly clean the filter, removing any accumulated food residue. If these steps don’t resolve the problem, the drain pump itself may be malfunctioning. Listen for unusual noises during the drain cycle – a humming sound could indicate a blockage within the pump.
In more severe cases, a blocked house drain line could be the cause. If you suspect this, consult a plumber. Always disconnect power before attempting any internal repairs.

Dishwasher Not Cleaning Properly
If your Kenmore 665 dishwasher isn’t delivering sparkling clean dishes, several factors could be at play. First, verify proper loading techniques – overcrowding prevents water from reaching all surfaces. Ensure spray arms rotate freely and aren’t blocked by dishes or utensils. Inspect the spray arm holes for clogs and clear them with a toothpick if necessary.
Insufficient detergent is a frequent cause. Use the recommended amount for your water hardness level and detergent type. Old or improperly stored detergent can also lose effectiveness. Confirm the water temperature reaching the dishwasher is at least 120°F (49°C).
A dirty filter significantly reduces cleaning performance. Regularly clean the filter to remove food particles. Finally, check the dishwasher’s interior for mineral buildup, which can hinder cleaning.
Error Codes and Meanings
The Kenmore 665 dishwasher utilizes error codes to diagnose internal issues. Understanding these codes can save time and potentially avoid unnecessary service calls. A code ‘F1’ typically indicates a water temperature sensor malfunction, requiring professional inspection. ‘F2’ signals a heating element failure, preventing proper water heating for sanitation.
Error ‘F3’ often points to a problem with the water inlet valve, hindering water entry into the dishwasher. A ‘F4’ code suggests a drain pump issue, causing water retention. ‘F5’ usually relates to a pressure sensor fault, impacting wash cycle performance.
If you encounter an error code not listed here, or if the issue persists after attempting basic troubleshooting, consult the full service manual or contact Kenmore support for assistance. Always disconnect power before attempting any repairs.

Additional Resources

For further support, visit the Kenmore website for warranty details and FAQs. Replacement parts and detailed diagrams are also readily available online.
Kenmore Support and Warranty Information
Kenmore provides comprehensive support for your Model 665 dishwasher. For immediate assistance, visit the official Kenmore website. There, you’ll find a robust FAQ section addressing common concerns and troubleshooting steps. You can also access downloadable manuals and helpful guides directly from their support portal.
Warranty coverage for the Kenmore 665 typically includes a one-year limited warranty covering defects in materials and workmanship. This warranty protects against malfunctions occurring under normal household use. Be sure to register your appliance promptly after purchase to activate your warranty benefits. Keep your proof of purchase safe, as it’s required for any warranty claims.
For personalized support, Kenmore offers customer service via phone and online chat. Their knowledgeable representatives can assist with complex issues, schedule service appointments, and process warranty claims efficiently. Contact information is readily available on the Kenmore website. Remember to have your model number and serial number handy when contacting support for faster service.
Finding Replacement Parts
Locating replacement parts for your Kenmore Model 665 dishwasher is straightforward. The Kenmore website offers a dedicated parts store where you can search for components using your model number. This ensures compatibility and a proper fit. Several authorized online retailers also specialize in appliance parts, providing a wider selection and competitive pricing.
Commonly replaced parts include spray arms, filters, door latches, and heating elements. Before ordering, it’s helpful to have the part number from your dishwasher’s parts diagram (found in this manual). This speeds up the process and minimizes errors. Always prioritize genuine Kenmore parts to maintain the dishwasher’s performance and warranty validity.
If you’re unsure about identifying the correct part, Kenmore’s customer support team can assist you. They can help you navigate the parts catalog and confirm compatibility. Remember to exercise caution when handling and installing replacement parts, and disconnect the power supply before any repairs.